
Hi there, I have found a few Blogs that I left in draft for some reason, fully finished too? So if you are wondering why a Xmas/Halloween Blog in February, that’s your reason. This is me trying out the tutorials with a bit of Vlogging??? Mmmm its a slow build. So here is the original Blog.
Good Morning. I am setting up the Conservatory and Summer House for Hannah’s Halloween Party. But to do that I have to Clear the conservatory, which means wrapping up the Xmas Presents I bought this week! YES I DID SAY I AM WRAPPING XMAS PRESENTS IN OCTOBER!!!! I just can’t do the rushed Xmas Eve Wrap up anymore!!!! And to be honest, I always having to be a Month ahead with my DT work and 2 or 3 Months ahead with my Workshops and Clarity Plans well, it is all finally having an impact on my own private life – I am becoming organised, I don’t just wake up everyday and think about what I am doing Today! Because I actually planned today yesterday!!!!! I planned the Party and bought the bits and bobs Last Week!

I am so far ahead of myself now I forget which Month I am in???? Now this can be a good thing but not always, like when you start throwing food away in your fridge because you think it is next week because that’s where your planning head is!!! Seriously I literally chucked out food that I thought was out of date and it still had a good week of life left!!! Life is never so easy weather you plan ahead or Plan nothing at all is it?????
So anyway I needed some Xmas Tags Quickly and decided to make my Own! Then I thought Maybe I could share this with you. Any excuse to Blog really.
I do have my own Wrapping Paper that I designed last year and put up on Sazzle but I haven’t had to order some for this year yet. They have put the price up too. But there is usually a 10 or 15% offer on. Now this wrapping paper may seem expensive but it is actually a 6Mtr roll, and it is a very strong paper too. https://www.zazzle.co.uk/store/samshomecookeddesign Anyway if you want to take a look this link takes you to my shop.
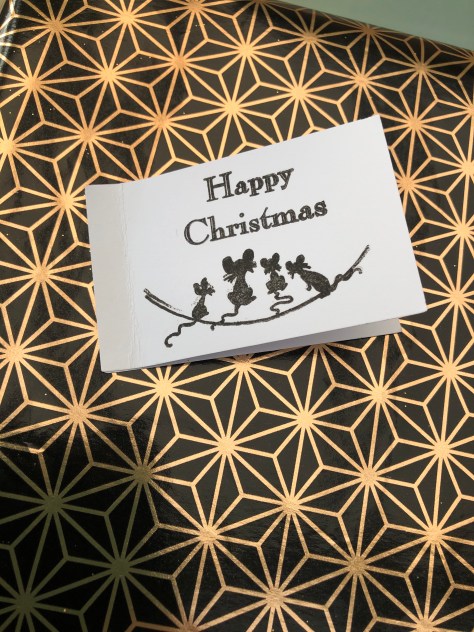
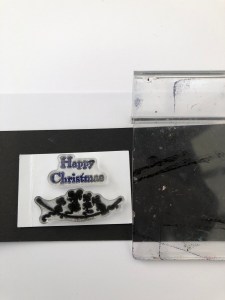
So back to the Tag – the picture above shows you the finished Tag and this is what I used to make it.

So the items are….
A #Claritystamp Radiance Ink Pad – or Black Archival
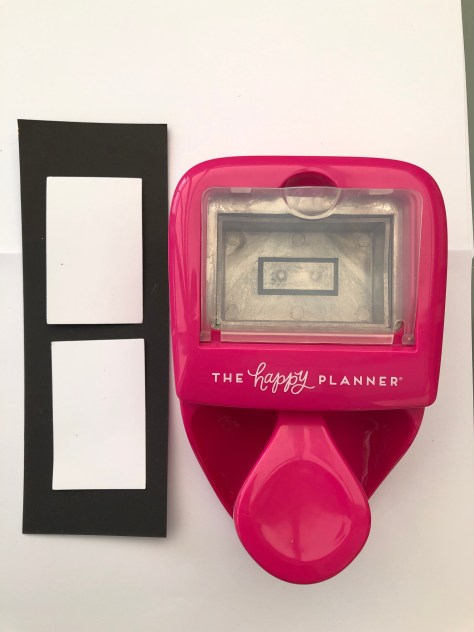
#WeRMemoryKeepers #TheHappyPlanner Punch – this is the Large one – it makes a 3″by2″ piece of card, so if you don’t have the punch just cut the strips of card.
# Twas The Night Frame Stamp by @ Claritystamp
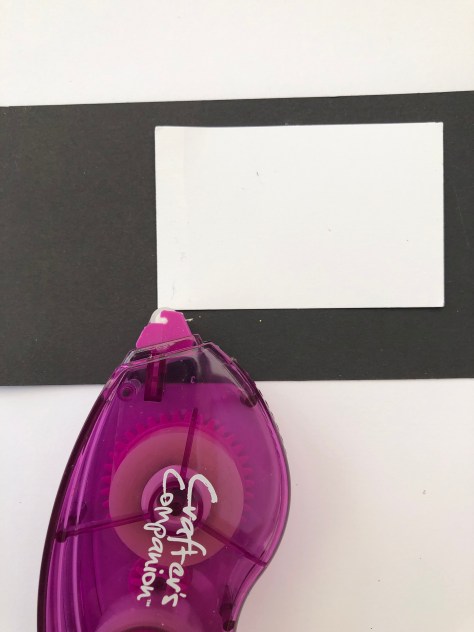
A #CraftersCompanion tape runner which Clarity also sell – these were also on offer at the weekend too during my workshop for the Crafters Companion Birthday Celebrations – so we all bagged a few there too. It was perfect timing as we were making my Twas the Night flip book.
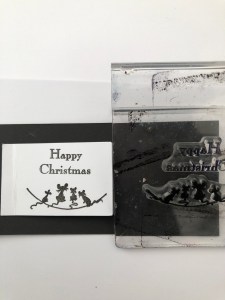
Method – so easy you will wonder why I even did a tutorial????
Punch or Cut 2 pieces of card 3″by 2″
Run the Glue Runner down the left hand side of one of the cards
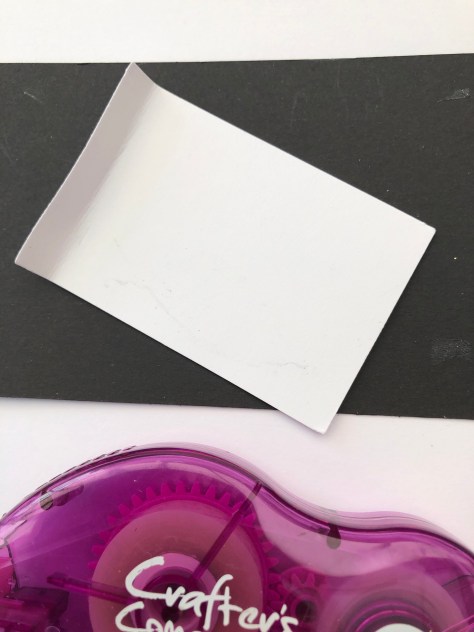
Attach the other card to the top where the glue is, making sure all sides are lined up. Then bend slightly at the glued edge backwards and forwards. This gives you a Tag that opens up like a card.
Line up your sentiment and these gorgeous Mice – obviously you could use other stamps too. https://claritystamp.com/products/twas-the-night-extras-br-unmounted-clear-stamp-set?_pos=10&_sid=1b25f02b7&_ss=r&variant=28415694913
Pick them up with the Stamp Handle so you know they will fit the card. Ink them up and Stamp them.
So, using your Lanny Fountain Pen – you don’t have a #LammyPen? another little gem. I love Ink Pens and these never let you down. You can buy them with a price range from £17 to £70. I use the cheaper ones because I collect different colours for my different Inks and they are lovely to write with.
Why the mention of the pen? It’s obvious I just wanted to slip my lovely pen in there somewhere. I love Kaweco Fountain Pens too.
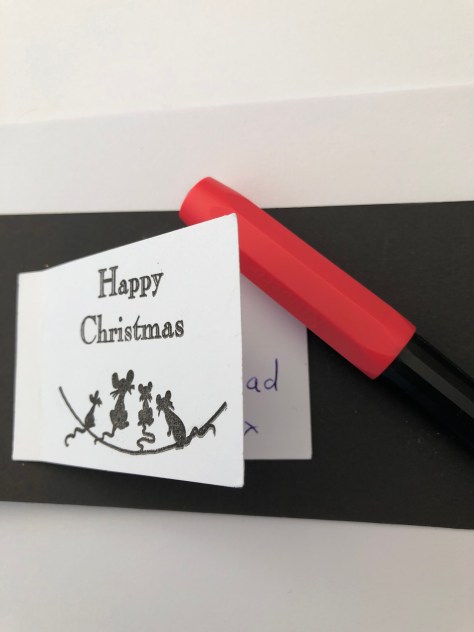
So that little bent edge has another purpose – you can run your tape runner along the back of it and stick it to the present or you can put a hole in it and attach it with string. But the main reason is, not only does it open but it shows people that there is actually a message inside. Sounds daft I know, but in the excitement of Xmas if it’s not obvious that it opens the inner message may get missed.

I would also maybe ink up the edges to match the wrapping paper I am using, or you could stamp in coloured ink. For me though, I think this image is beautiful as it is and stands out perfectly in black.
This is one of my absolute favourite sets of Clarity Stamps. I will do a tutorial on the flip book I made at some point but I also currently have a Youtube Video up on the Claritystamp Chanel showing another card I made with this set and my #GelPlate. You can click here if you would like to watch it.
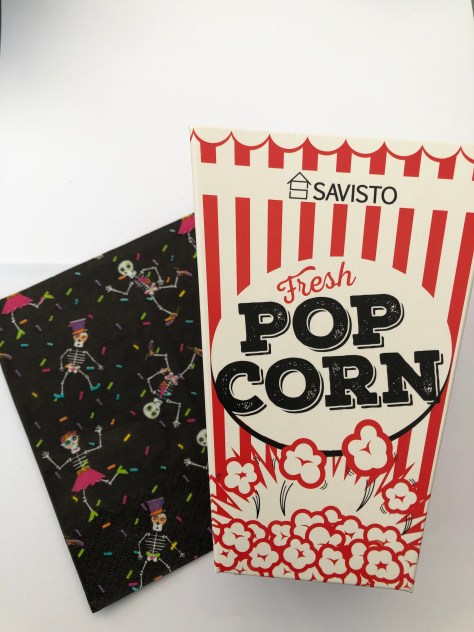
So now I need to turn a Popcorn Box into a Halloween Box – easy!
So thank you for popping in. I will give you a quick view of how we decorated for Halloween in our Summerhouse if you are interested. I have always enjoyed setting up a party room. !
Please Follow my Blog if you like it and all positive comments are welcome too, ha ha filter out the bands ones? of course I can! Xxx
Sam Crowe.
Discover more from HomeCookedArt.Studio by Sam Crowe
Subscribe to get the latest posts sent to your email.
